Deploying a Keras Deep Learning Model as a Web Application in Python
 (Source)
Deep learning, web apps, Flask, HTML, and CSS in one project
Building a cool machine learning project is one thing, but at the end of the day, you want other people to be able to see your hard work. Sure, you could put the whole project on GitHub, but how are your grandparents supposed to figure that out? No, what we want is to deploy our deep learning model as a web application accessible to anyone in the world.
In this article, we’ll see how to write a web application that takes a trained Keras recurrent neural network and allows users to generate new patent abstracts. This project builds on work from the Recurrent Neural Networks by Example article, but knowing how to create the RNN isn’t necessary. We’ll just treat it as a black box for now: we put in a starting sequence, and it outputs an entirely new patent abstract that we can display in the browser!
Traditionally, data scientists develop the models and front end engineers show them to the world. In this project, we’ll have to play both roles, and dive into web development (almost all in Python though).
This project requires joining together numerous topics:
- Flask: creating a basic web application in Python
- Keras: deploying a trained recurrent neural network
- Templating with the Jinja template library
- HTML and CSS for writing web pages
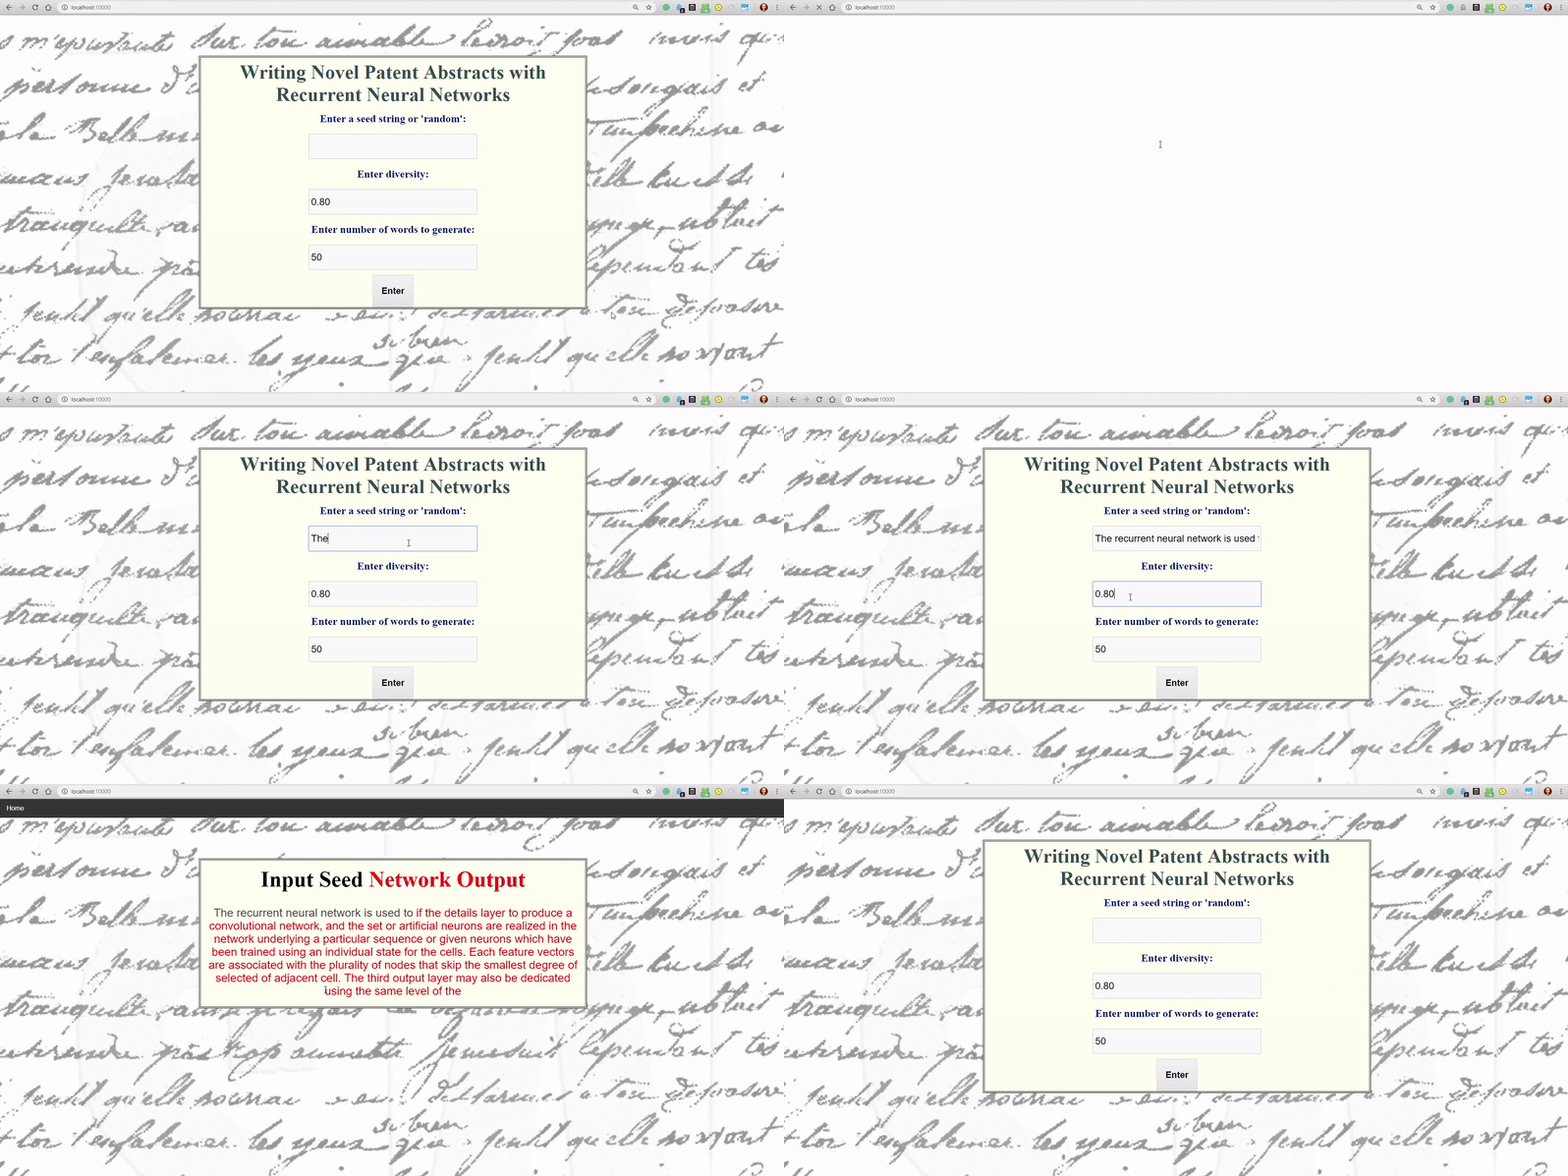
The final result is a web application that allows users to generate entirely new patent abstracts with a trained recurrent neural network:
 Finished neural net web application
The complete code for this project is available on GitHub.
Approach
The goal was to get a web application up and running as quickly as possible. For that, I went with Flask, which allows us to write the app in Python. I don’t like to mess with styling (which clearly shows) so almost all of the CSS is copied and pasted. This article by the Keras team was helpful for the basics and this article is a useful guide as well.
Overall, this project adheres to my design principles: get a prototype up and running quickly — copying and pasting as much as required — and then iterate to make a better product.
A Basic Web Application with Flask
The quickest way to build a web app in Python is with Flask. To make our own app, we can use just the following:
from flask import Flask
app = Flask(__name__)

@app.route("/")
def hello():
    return "<h1>Not Much Going On Here</h1>"

app.run(host='0.0.0.0', port=50000)
If you copy and paste this code and run it, you’ll be able to view your own web app at localhost:50000. Of course, we want to do more than that, so we’ll use a slightly more complicated function which basically does the same thing: handles requests from your browser and serves up some content as HTML. For our main page, we want to present the user with a form to enter some details.
User Input Form
When our users arrive at the main page of the application, we’ll show them a form with three parameters to select:
- Input a starting sequence for RNN or select randomly
- Choose diversity of RNN predictions
- Choose the number of words RNN outputs
To build a form in Python we’ll use [wtforms](https://wtforms.readthedocs.io/) .The code to make the form is:
This creates a form shown below (with styling from main.css):

The validator in the code make sure the user enters the correct information. For example, we check all boxes are filled and that the diversity is between 0.5 and 5. These conditions must be met for the form to be accepted.
 Validation error
The way we actually serve the form is with Flask is using templates.
Templates
A template is a document with a basic framework that we need to fill in with details. For a Flask web application, we can use the Jinja templating library to pass Python code to an HTML document. For example, in our main function, we’ll send the contents of the form to a template called index.html.
When the user arrives on the home page, our app will serve up index.html with the details from form. The template is a simple html scaffolding where we refer to python variables with `` syntax.
For each of the errors in the form (those entries that can’t be validated) an error will flash. Other than that, this file will show the form as above.
When the user enters information and hits submit (a POST request) if the information is correct, we want to divert the input to the appropriate function to make predictions with the trained RNN. This means modifying home() .
Now, when the user hits submit and the information is correct, the input is sent either to generate_random_start or generate_from_seed depending on the input. These functions use the trained Keras model to generate a novel patent with a diversity and num_words specified by the user. The output of these functions in turn is sent to either of the templates random.html or seeded.html to be served as a web page.
Making Predictions with a Pre-Trained Keras Model
The model parameter is the trained Keras model which load in as follows:
(The tf.get_default_graph() is a workaround based on this gist.)
I won’t show the entirety of the two util functions (here is the code), and all you need to understand is they take the trained Keras model along with the parameters and make predictions of a new patent abstract.
These functions both return a Python string with formatted HTML. This string is sent to another template to be rendered as a web page. For example, the generate_random_start returns formatted html which goes into random.html:
Here we are again using the Jinja template engine to display the formatted HTML. Since the Python string is already formatted as HTML, all we have to do is use `` (where input is the Python variable) to display it. We can then style this page in main.css as with the other html templates.
Output
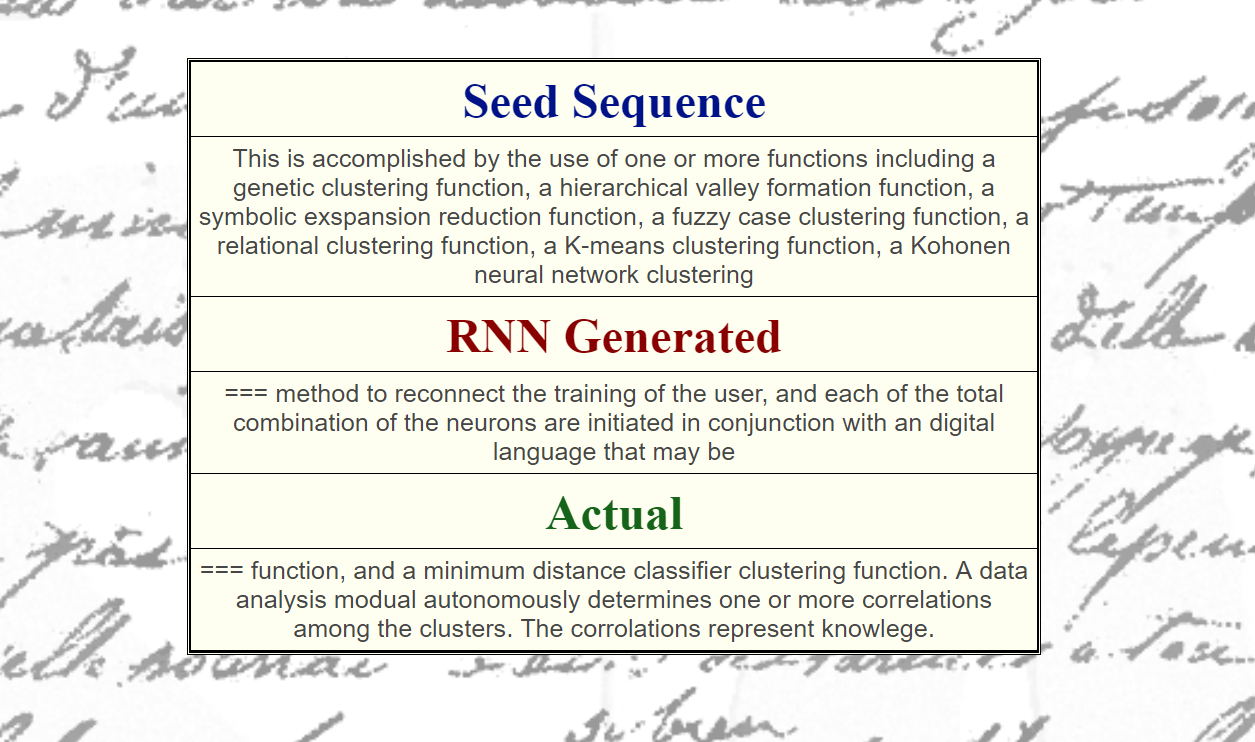
The functiongenerate_random_start picks a random patent abstract as the starting sequence and makes predictions building from it. It then displays the starting sequence, RNN generated output, and the actual output:
 Random starting sequence output.
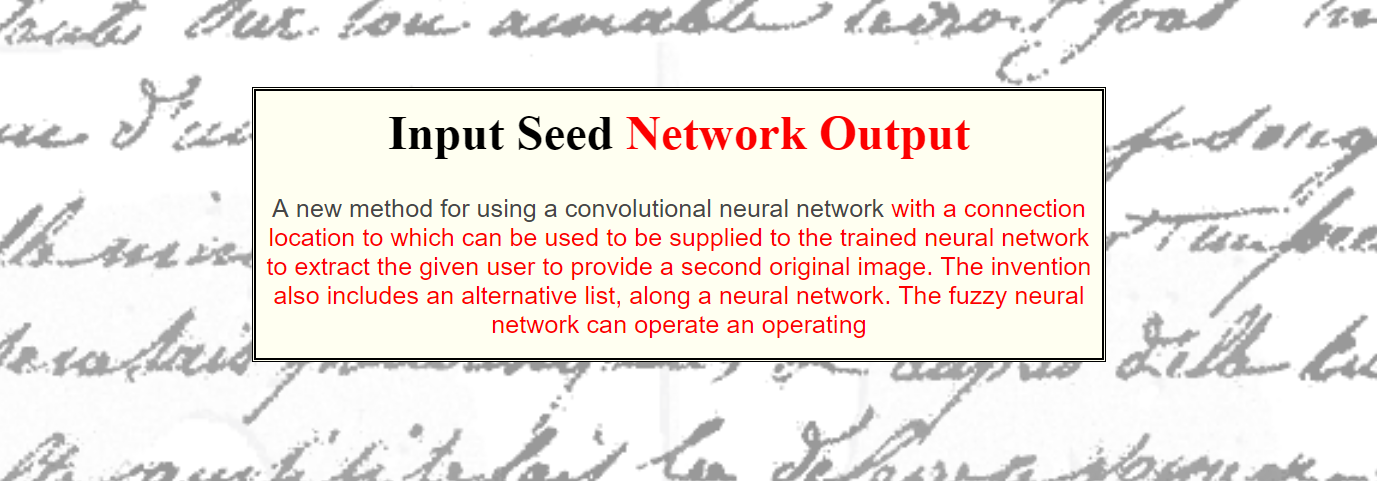
The functiongenerate_from_seed takes a user-supplied starting sequence and then builds off of it using the trained RNN. The output appears as follows:
 Output from starting seed sequence
While the results are not always entirely on-point, they do show the recurrent neural network has learned the basics of English. It was trained to predict the next word from the previous 50 words and has picked up how to write a slightly-convincing patent abstract! Depending on the diversity of the predictions, the output might appear to be completely random or a loop.
Running the App
To run the app for yourself, all you need to do is download the repository, navigate to the deployment directory and type python run_keras_server.py . This will immediately make the web app available at localhost:10000.
Depending on how your home WiFi is configured, you should be able to access the application from any computer on the network using your IP address.
Next Steps
The web application running on your personal computer is great for sharing with friends and family. I’d definitely not recommend opening this up to everyone on your home network though! For that, we’ll want to set the app up on an AWS EC2 instance and serve it to the world (coming later) .
To improve the app, we can alter the styling (through [main.css](https://github.com/WillKoehrsen/recurrent-neural-networks/blob/master/deployment/static/css/main.css) ) and perhaps add more options, such as the ability to choose the pre-trained network. The great thing about personal projects is you can take them as far as you want. If you want to play around with the app, download the code and get started.
 Complete Application Running
Conclusions
In this article, we saw how to deploy a trained Keras deep learning model as a web application. This requires bringing together a number of different technologies including recurrent neural networks, web applications, templating, HTML, CSS, and of course Python.
While this is only a basic application, it shows that you can start building web applications using deep learning with relatively little effort. There aren’t many people who can say they’ve deployed a deep learning model as a web application, but if you follow this article, count yourself among them!
As always, I welcome feedback and constructive criticism. I can be reached on Twitter @koehrsen_will or through my personal website willk.online.