
How to Write a Jupyter Notebook Extension

Make the Jupyter Notebook your playground
Jupyter Notebook Extensions are simple add-ons which can significantly improve your productivity in the notebook environment. They automate tedious tasks such as formatting code or add features like creating a table of contents. While there are numerous existing extensions, we can also write our own extension to do extend the functionality of Jupyter.
In this article, we’ll see how to write a Jupyter Notebook extension that adds a default cell to the top of each new notebook which is useful when there are libraries you find yourself importing into every notebook. If you want the background on extensions, then check out this article. The complete code for this extension is available on GitHub.
The final outcome of the Default cell extension is shown below:
 Extension to add a default cell to the top of every notebook.
Notes before Starting
(If you don’t yet have Jupyter Extensions, check out this article or just run the following code in a command prompt: pip install jupyter_contrib_nbextensions && jupyter contrib nbextensions install and then start a new notebook server and navigate to the extensions tab).
Unfortunately, there’s not much official documentation on writing your own extension. My tactic was to read the other extensions, copy and paste copiously, and experiment until I figured it out. This Stack Overflow question and answer provided the basic code for this extension.
Structure of a Jupyter Notebook Extension
There are thedocs.io/en/latest/internals.html):
description.yaml: A configuration file read by Jupytermain.js: The Javascript code for the extension itselfREADME.md: A markdown description of extension
(We can also have more functions in other files or css for styling).
These 3 files should live in a single directory which we’ll call default_cell . This folder, in turn, needs to be in the nbextensions subdirectory of the jupyter_contrib_extensions library (what you installed with pip. To find the location of a library installed with pip run pip view package. )
My jupyter_contrib_extensions directory is:
/usr/local/lib/python3.6/site-packages/jupyter_contrib_nbextensions/nbextensions
So the file structure looks like (with nbextensions as shown above):
nbextensions/
    default_cell/
        - description.yaml
        - main.js
        - README.md
When you run jupyter notebook, Jupyter looks in this location for extensions, and shows them on the extensions tab on the server:
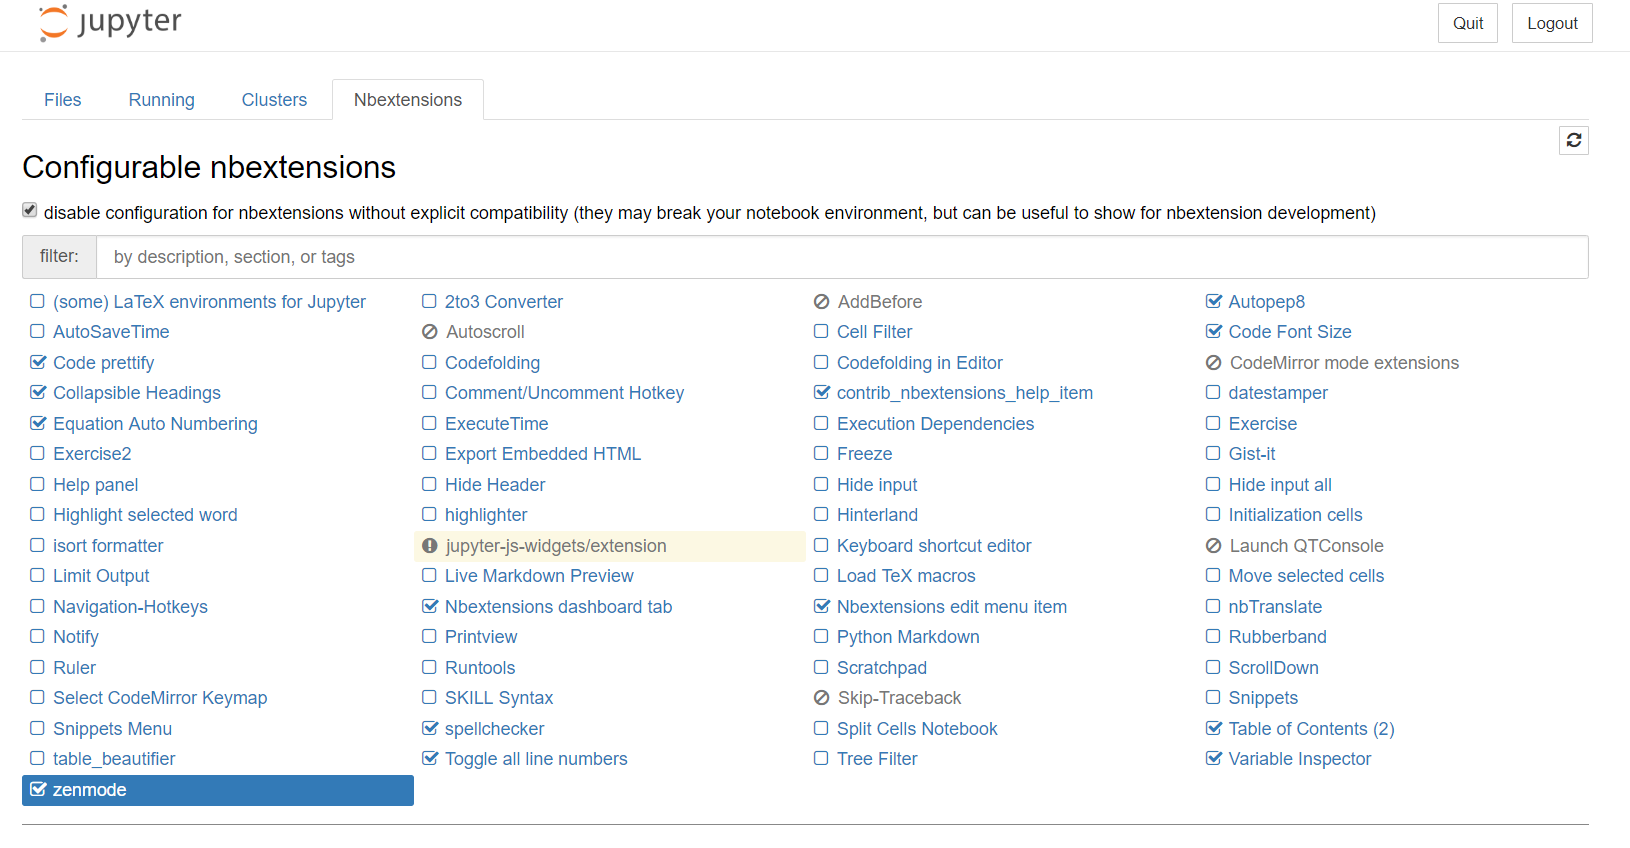 Jupyter Notebook Extensions tab
When you make a change to the extension files while developing and you want to see the effects in a Jupyter Notebook,you need to run the command jupyter contrib nbextensions install to rewrite the Jupyter config files. Then, restart the notebook server to see your changes.
With the details out of the way, let’s go through the three files we need.
description.yaml
able standard for writing configuration and header files. The YAML file describes the extension to the Jupyter Extensions Configurator to be rendered on the extensions tab.
This is a fairly easy file to copy + paste and modify to our needs.
This is then rendered nicely on the NBExtensions tab in the notebook:
 The compatibility indicates the versions of Jupyter for which the extension works. I just added all of them (3.x — 6.x) and it seemed to work fine!
main.js
This is the heart of the application where the actual logic for the extension lives. Jupyter Notebooks are run in the browser, which means that extensions must be written in Javascript, the language of the web.
It can be a little difficult to figure out what commands to use to make the notebook do what you want. One way to experiment is using the Chrome developer tools (cntrl + shift + i on Windows) or right-click > inspect.
With the developer tools open, we can use the console tab to run commands.
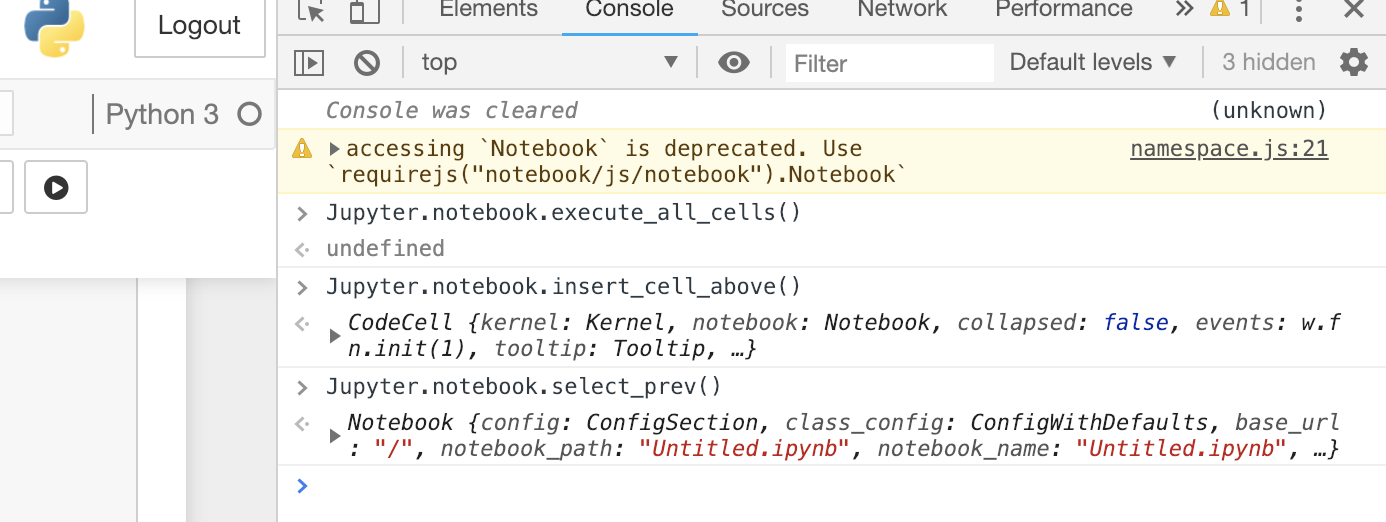 Console in Chrome developer tools
Try opening the developer tools in a Jupyter Notebook and play with options that start with Jupyter.notebook. Any commands you enter will have to be in Javascript. An example of this behavior can be seen in the clip below. I open up the developer tools and then run a few commands to execute cells, insert a new cell, and select the previous cell.
 Developing the Javascript code required a lot of experimenting like this! It also helps to read the other extensions to figure out what you need to do.
The final main.js is below:
The most important part of the code is the add_cell function.
var add_cell = function() {
    Jupyter.notebook.
    insert_cell_above('code').
    // Define default cell here
    set_text(`Define default cell here`);
    Jupyter.notebook.select_prev();
    Jupyter.notebook.execute_cell_and_select_below();
};
This adds a code cell above the currently selected cell with the python code written in the parenthesis (in the set_text call). This is where the default code cell should be defined. The function then executes the cell and selects the one below.
 The
The load_ipython_extension function first checks the number of cells in the notebook. If there is only one cell — a new notebook — it calls the add_cell function which places the default cell at the top of the notebook.
// Run on start
function load_ipython_extension() {// Add a default cell if a new notebook
    if (Jupyter.notebook.get_cells().length===1){
        add_cell();
    }
    defaultCellButton();
}
It then runs the defaultCellButton function which places a button on the Jupyter Notebook toolbar. We can use this button to add and run the default cell above the currently selected cell. This could be useful when we have an already started notebook and we want our normal imports.
 Function of defaultCellButton
There is an almost unlimited number of tasks we could accomplish with Javascript in the browser. This is only a simple application, but there are many more complex Jupyter extensions (such as the Variable Inspector) that demonstrate more of the capabilities. We can also write applications in Javascript that call on Python scripts for even greater control.
README.md
A readme markdown file should be familiar to anyone with even a little experience programming. Here is where we explain what our application does and how to use it. This is displayed on the extensions tab:
 README rendered on the extensions tab
(The actual code is pretty boring but for completeness, here it is)
Default Cell
**=========**
Adds and runs a default cell at the top of each new notebook. To change the default cell, edit the `add_cell` function in the `main.js` file.
The relevant section is`Jupyter.notebook.insert_cell_above('code', 0).set_text(``)`Set the `text` to whatever you would like.This extension
also adds a button to the toolbar allowing you to insert and run the default cell above your current cell. This can be helpful if you open an
already started notebook and notice you are missing some common imports.This extension is a work in progress and any help would be
appreciated. Feel free to make contributions on GitHub or contact the author (Will Koehrsen) at wjk68@case.edu
Once you have the three required files, your extension is complete.
To see the extension working, make sure the default_cell directory is in the correct location, run jupyter contrib nbextensions install and start up a Jupyter Notebook server. If you navigate to the NBExtensions tab, you will be able to enable the extension (if you don’t have the tab, open a notebook and got to Edit > nbextensions config).
 Extension enabled
Start up a new notebook and see your extension at work:
Default cell jupyter notebook extension
This extension isn’t life-changing, but it might save you a few seconds!
Conclusions
Part of the joy of gaining computer literacy is realizing that if you want to accomplish something on a computer, chances are that you probably can with the right tools and willingness to learn. This small example of making a Jupyter Notebook extension demonstrates that we are not limited by what we get out of the box. We just need a few lines of code to accomplish our goals.
Hopefully, either this extension proves useful to you or inspires you to write your own. I have gotten a lot of use from extensions and am looking forward to seeing what else people can develop. Once you do develop an extension, share it so others can marvel at your code and benefit from your hard work.
As always, I welcome feedback and constructive criticism. I can be reached on Twitter @koehrsen_will or through my personal website willk.online.