
Deploying a Python Web App on AWS
 (Source)
How to share your Python project with the world
While I enjoy doing data science and programming projects for the personal thrill that comes with building something of my own, there is also a certain joy in sharing your project online with anyone in the world. Fortunately, thanks to Amazon Web Services (AWS), in a few minutes, we can deploy a Python web application to the entire world for free.
In this article, we’ll see how to deploy a deep learning web app to AWS on a free EC2 instance. This article will work with the app built in Deploying a Keras Deep Learning Model as a Web Application in Python using the model developed in Recurrent Neural Networks by Example in Python. Neither of these is required, just know that our application generates novel patent abstracts with an RNN. All the code for the project can be found on GitHub.
Amazon Web Services EC2
Amazon Web Services is the umbrella term for the range of Amazon’s cloud computing offerings. We be using Amazon Elastic Compute Cloud (EC2), a service where we rent virtual computers in the cloud to run applications. AWS EC2 offers a free tier so we can deploy without spending a cent.
To get started, create an AWS account and head to the EC2 console at https://console.aws.amazon.com/ec2. Click on the Launch Instance button which takes you to choose an Amazon Machine Instance (AMI), “ a template that contains the software configuration (operating system) required to launch your instance.” You can use any os you’re familiar with (although some aren’t eligible for the free tier), but I’ll be using Ubuntu Server 18.04:
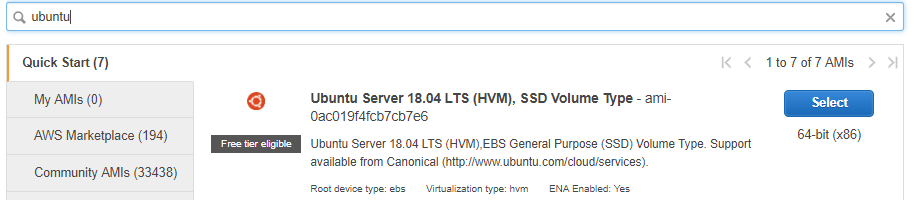 AMI type (Ubuntu 18.04)
Hit Select, then on the next page choose the free tier eligible t2.micro instance (an instance is the hardware for our AMI). This only has 1 CPU and 1 GB of RAM, but it will actually be enough to run our pre-trained recurrent neural network application! If you’re expecting more traffic or running a cpu-intensive application, you’ll probably have to shell out.
Security Groups
Select the instance type you want and then go to tab 6. Configure Security Group at the top of the page. Security groups filter the traffic into and out of our instance — basically, who can access our virtual computer.
You (and only you) will need to access the instance via ssh, so add a rule that allows Source “My IP” for SSH. We want others to be able to access our app in a web browser, so add a rule to allow HTTP access for all sources. The final security configuration is:
 Security group rules
Next, hit Review and Launch and then Launch. This brings up the options for using a key pair. You need this to access the server via ssh, so make sure to create a new key pair and save the private key somewhere you remember it. If you lose this, you will not be able to access your instance again!
Finally, hit Launch Instances and Amazon will start up your very own virtual machine which is physically located…somewhere. Wait a few minutes for the instance to boot before heading to the next step: connecting to your instance.
Connecting to Server via SSH
Once the instance is up and running, select it on the EC2 Instance dashboard (Services > EC2 > Running Instances) and hit Connect. This will give us the exact commands to connect to the instance.
 Connect dialog from EC2 running instances dashboard.
Copy the example code, and paste it into Bash or a command prompt running in the folder with your private key (you generate this when launching your instance). Assuming everything goes well, you’ll be logged into your instance and see a familiar terminal command prompt.
Installing Requirements
This AMI comes equipped with Python 3.6, so we just need to clone the repository and install the app dependencies. First, get the repository:
git clone [https://github.com/WillKoehrsen/recurrent-neural-networks.git](https://github.com/WillKoehrsen/recurrent-neural-networks.git)
Then install pip, move into the repository, and install the requirements.
sudo apt-get update
sudo apt-get install python3-pip
cd recurrent-neural-networks
pip3 install --user -r requirements.txt
Running and Accessing the Web Application
Running the app is simple (you might need sudo for the second command):
cd deployment
python3 run_keras_server.py
(If you want to understand what’s going on in the web application, take a look at the previous article for the development process).
You should see the following output in the terminal:

While it looks like this the app is running on localhost:80/, that’s on the virtual machine. For us to access the web app, we’ll have to use the instance’s Public DNS IPv4 which can be found on the running instance dashboard.
 Public DNS for running instance.
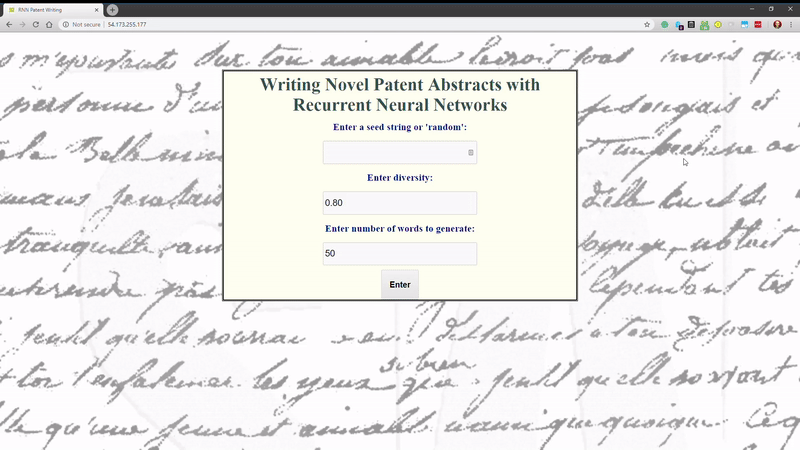
Copy and paste the address into your browser, and you’ll see the application!
 Homepage of the web application.
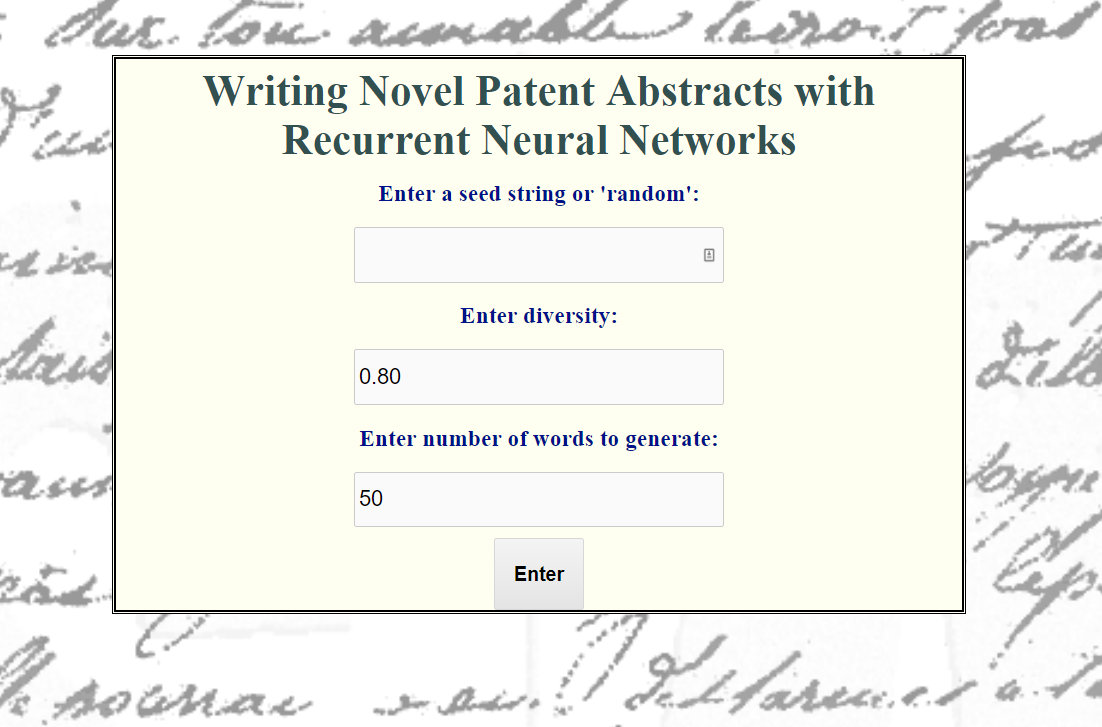
Feel free to play around with the recurrent neural network application. What it’s doing is generating new patent abstracts with a recurrent neural network trained on thousands of abstracts with the keyword “neural network” You can either enter random for a random starting sequence, or your own sequence. (To see the development, check out this article or this notebook).
 Keras recurrent neural network application.
Your application can now be reached by anyone in the world via the IPv4. If you want the app to keep running even after you log out of the instance, run it in a Screen session. (Screen is a handy program that lets you run terminal sessions from a single terminal window using virtual consoles.)
# From within recurrent-neural-networks/deployment
screen -R deploy
python3 run_keras_server.py
My (if I haven’t shut it down or run into errors) application should be running at http://54.173.255.177/. Because I’m using a t2.micro instance, the cost to run this web application in perpetuity is precisely $0.00! If you want a domain name, you can pick up one from a domain name registrar such as Hover.
Next Steps
Although this is a decent solution to quickly deploy a personal project, this is not a production-ready deployment! For that, you’ll want to make sure to use proper security (with HTTPS and a certified certificate). You’ll also want to make sure your application can handle expected traffic. Only use this specific solution for small projects without sensitive data.
Conclusions
We truly live in incredible times: with Flask we can develop a Python web app in a few minutes and then we can deploy it to the world free with AWS. The general process we followed was: develop a web application (in Python preferably), rent commodity hardware from a cloud provider, and deploy a web application to the world.
If you were able to follow all the tutorials from the implementation of a recurrent neural network to developing a local web application to deploying on AWS, then you’ll have completed an impressive project! The overall process from a blank file to a running web application may be daunting, but like most technology problems, if you break it down, each step isn’t overwhelming and there are many open-source tools to make the process easy. If you’re a data scientist bored with doing self-contained analysis in Jupyter Notebooks, take the initiative to do a project you can deploy as an application. It’s good to branch out into other disciplines, and building and deploying a web application is a great opportunity to learn some new skills.
As always, I welcome feedback and constructive criticism. I can be reached on Twitter @koehrsen_will or through my personal website willk.online.