
Controlling Your Location In Google Chrome
A Simple Step to Regain (some) of Your Digital Autonomy
For most of us, the story of our relationship with Google is one in which we have willingly ceded to Google ever more control of our digital lives. While this has resulted in great product recommendations and personalized search results, we have to wonder when it becomes too much. Fortunately, there are a number of steps you can take to stem the loss of digital autonomy. One of the simplest actions is learning how to take control of your location in Google Chrome.
Manually Set Location Using Developer Tools
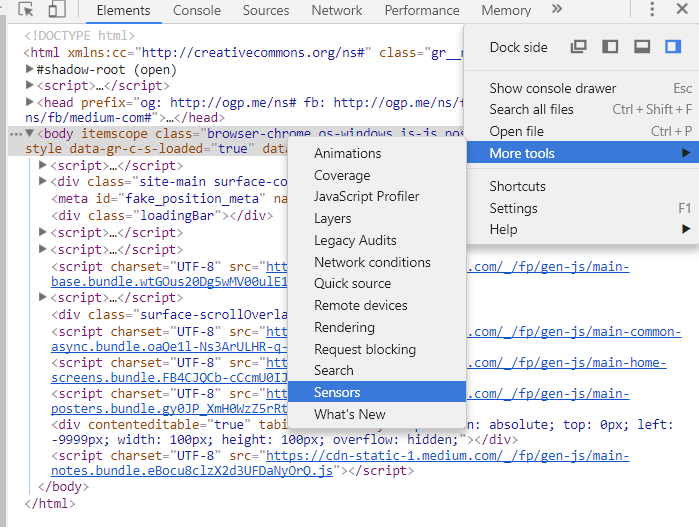
Using Google Chrome’s developer tools, you can easily set your location to any latitude and longitude coordinates. To access the developer tools in the console, press Control+Shift+I (Command+Option+J on Mac) or right-click on any web page and select inspect. Next, click the three vertical dots in the upper right of the developer tools panel (when you hover over the dots you should see “Customize and Control DevTools”). Find the “More Tools” entry, and click to expand the options. Select the “Sensors” option as shown.
 Display the Sensors Tab
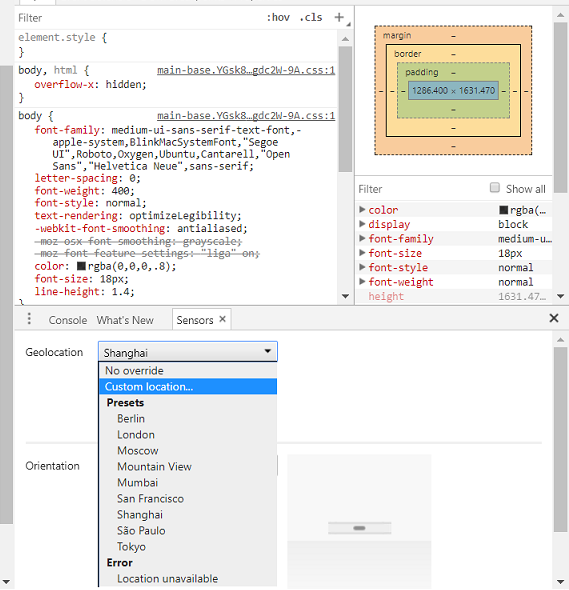
This will display the sensors tab in the bottom half of the developer tools panel. The first category under sensors is geolocation which will be set to “No override.” Expand the options and choose either a custom latitude and longitude set of coordinates or a preset location to change the physical location reported by your browser.
 Geolocation in the Sensors Tab in Developer Tools
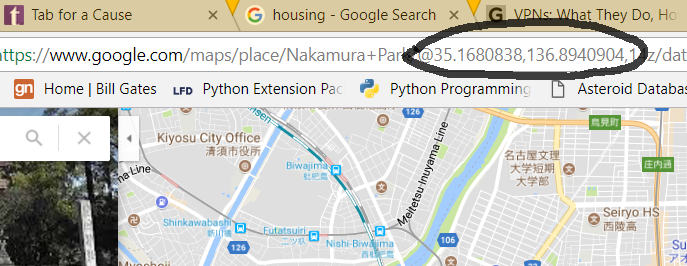
An easy way to find latitude and longitude coordinates is to open Google Maps and click on any location. The latitude and longitude of the center of your screen will appear in the address bar.
 Retrieving Location in Google Maps
Testing it Out
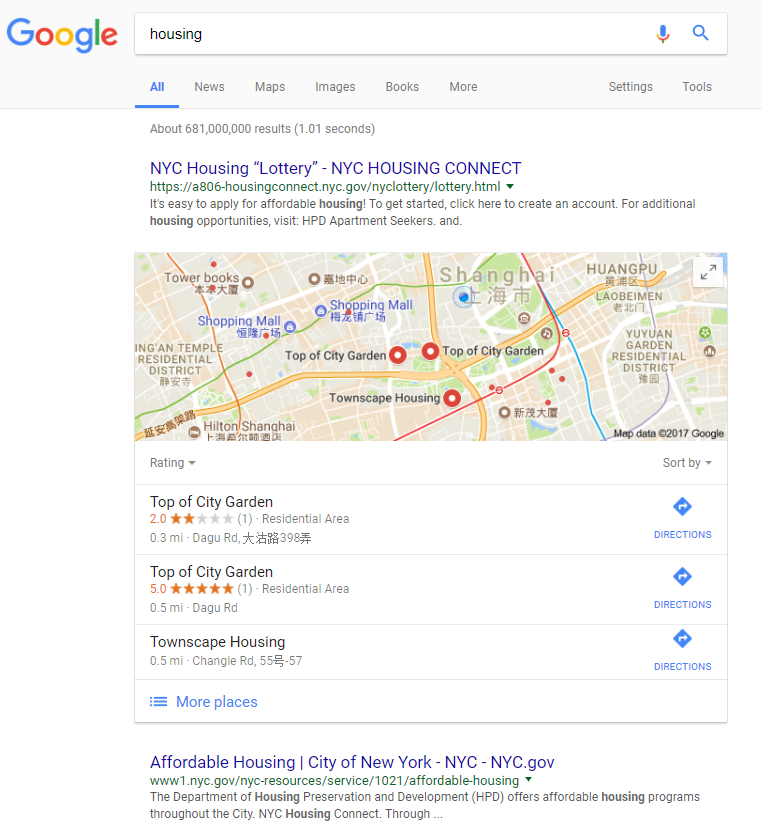
Let’s see how this well this works. Say we are looking for housing options in a new city. If I do a simple Google search for housing, Google will filter my search results based on my location.
 Google Search Results Based on My Location
Google gets your location from your IP address, location history, or recent search history, which can be great when you want location-relevant results, but frustrating if you want to see results for other locations. Luckily, now we can set our location to anywhere and compare the results. I’ll choose Shanghai and see what comes up.
 Housing Search Results after Setting Location to Shanghai
After setting my location to Shanghai, Google has decided to show me a map of Shanghai with potential locations of interest, but the websites listed are all for housing in New York. Perhaps this is because Google has figured out that people in Shanghai often look for housing in New York? I can’t claim to know how the search algorithm works, but it is clearly dependent on where Chrome thinks you are. This modification can be used on any website that asks for your location, such as weather sites.
 Weather Results with Location Set to Shanghai
Using the developer tools to manually set location is a very limited method. You must set your location on any new tab you open, and this change will not persist after you close the developer tools. However, there are a number of better solutions.
Disable Website Locations
If you do not want any websites to be able to access or even ask for your location, open the Google Chrome settings by clicking the three vertical dots at the upper right of Chrome ( when you hover over them you should see “Customize and control Google Chrome” ). Click on settings which will open the Chrome settings in another tab. Scroll down to advanced and click to expand the advanced settings. Under Privacy and security click on “Content settings” to control the information websites can access.
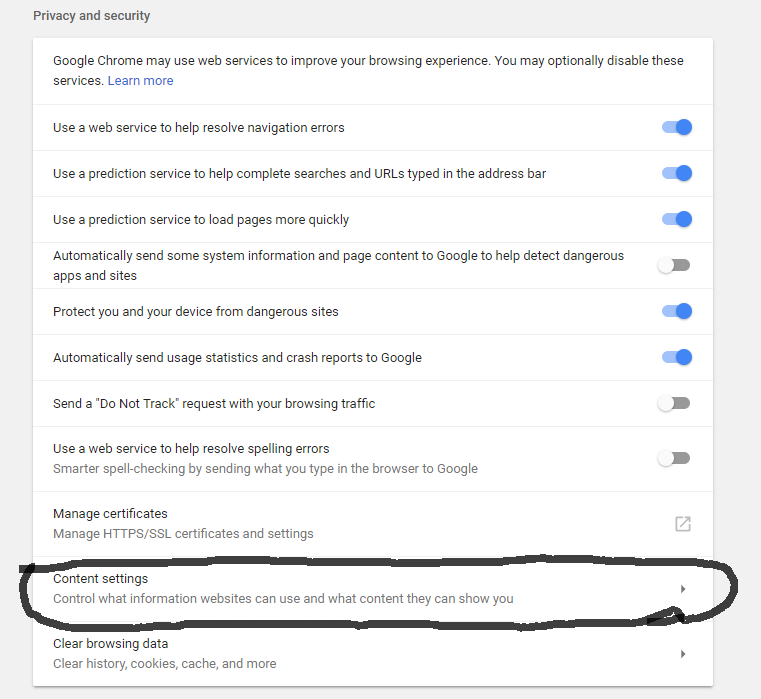 Accessing Website Content Settings in Google Chrome
Find and click on the option called location.
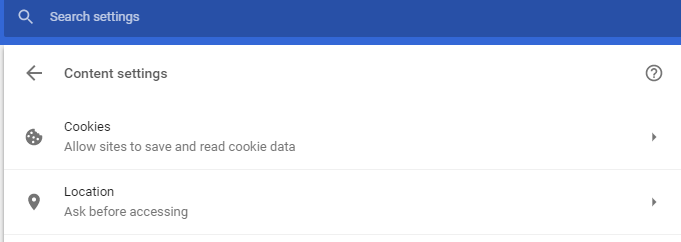 By default, Google Chrome will set this to “Ask before accessing” which is why you will often receive a pop-up box when arriving at a website asking if you want to allow or block the site from using your location. In order to not see this box again, click on location and then click on the blue slider which should change it to grey as shown below. If you see this screen, then congratulations, you have blocked all websites from accessing your location. However, Google can and will still know your location and can filter search results accordingly.
 Block All Sites from Accessing Your Location
From this location page, you can also manually designate the sites that have access to your location and those that are blocked. The websites that are allowed and blocked are those that you have either allowed or blocked respectively when asked by your browser in the past. If there is a website that you clicked “allow” but now no longer want to access your location, you can remove it from the allow list. Likewise you can do the same to websites you may have accidentally blocked.
Virtual Private Networks
For a more persistent method of altering your location, consider using a Virtual Private Network (VPN). These services route your computer’s traffic through servers that can be located in any country. Therefore, your IP address will be reported as that of the server, and you can typically choose the location of the server (if you pay for a decent VPN). VPNs are a necessity if you are doing any secure work on public networks and are a great way to access content that may be blocked in your particular geographic region (if for example you happen to live under an oppressive regime). As long as you are connected to the VPN, your traffic will appear to be coming from the server’s IP address and neither Google nor any website will be able to determine your true location. I recommend doing some research and paying a small yearly fee (about $5) for a legitimate VPN. They provide an extra layer of security and anonymity especially in public locations where most users typically do not take any precautions.
Conclusion
You now have a simple way to temporarily make Google or any website think you are somewhere else, or to obscure your location permanently if you choose to use a VPN. This is only a tiny step, but it is a step in the right direction of maintaining both your anonymity and security. Digital literacy is as important in the 21st century as print literacy was in the 20th, and this one action can be the start of regaining control of your digital experiences.
If you would like to know more ways to keep yourself safe and/or anonymous online, I recommend Kevin Mitnick’s book The Art of Invisibility. Mitnick is a former criminal hacker who now works for the good guys and his book outlines practical advice for digital safety and privacy.