
Five Minutes to Your Own Website
How to Use GitHub Pages and Jekyll to get started with your own — entirely free — blog
Building your own website is rewarding on several levels. There’s the opportunity to showcase your work to friends, family, and potential employers, the pride in making something, and the freedom to shape a (very small) part of the web to your tastes.
While Medium is a great option to start blogging because the limited features let you focus on writing, eventually, like me, you’ll want your own website to serve as a central location for your work. Fortunately, we live in a great age for creativity where you can use free tools to build a website in minutes.
In this post, we’ll see how to use the Jekyll site generator and GitHub Pages to build and publish a simple blog with no coding required. If you want an idea of the end product, you can take a look at my (work in progress) site.
Jekyll and GitHub Pages
Jekyll is a simple static site generator. This means it takes plain text files and renders them as a website that can then be served to the web through a web hosting service. One option for this service is GitHub Pages, free “websites hosted and easily published through GitHub.”
With Jekyll + GitHub Pages, the source files for your website live in a GitHub repository that is automatically published to the web. Basically, Jekyll transforms text documents in a repository into a website and then that website is hosted by GitHub. The only thing you have to worry about is writing posts and editing a few of the text files to make things look how you want. As the Jekyll design philosophy states:
Jekyll gets out of your way and allows you to concentrate on what truly matters: your content.
You can follow this guide on GitHub to set up a new blank website. However, if you’re looking to make a simple blog as quick as possible, a better option is to fork (a GitHub term meaning copy) the Jekyll Now repository which already has a blogging layout built and ready to be published.
After forking, go into the repository settings under your account and change the name to username.github.io.
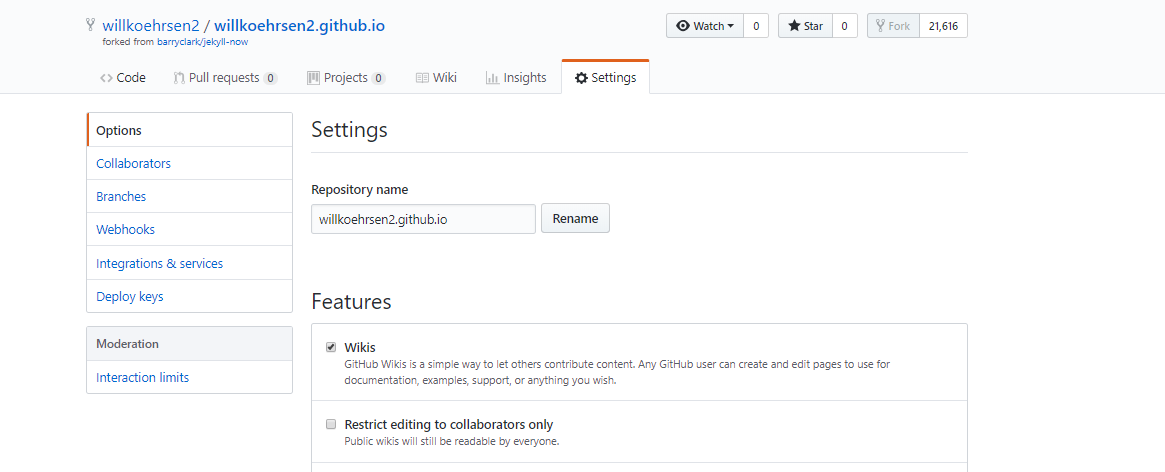 Fork the Jekyll Now repository and change the name to username.github.io
Within a few minutes, you’ll be able to navigate to username.github.io in your browser and see your new website published on the web! It’s not really yours yet, but you can fix that in a few steps.
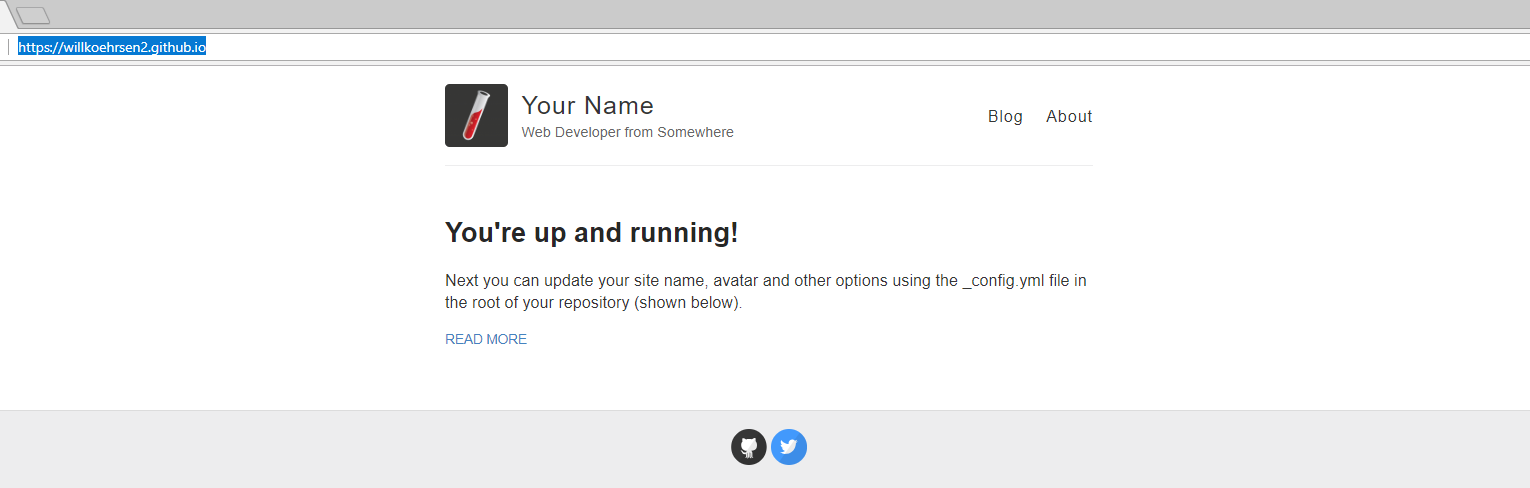 Default Jekyll Now website
You can edit any of the website files locally by cloning the repository and opening them in your favorite text editor. Then, when you commit and push your changes to GitHub, the website will automatically update. However, instead of local editing, I highly recommend the online Prose editor.
Prose Editor
Prose makes it much easier to see all of your files, quickly make changes, and commit and push them to GitHub as soon as you save. You’ll have to authenticate Prose with GitHub and then you can start improving your blog. For example, to begin personalizing the website, edit the _config.yaml file:
 Editing _config.yaml in Prose editor.
After hitting save, these changes can be seen online.
 Website after making changes to config file.
Writing Blog Posts
All blog posts in Jekyll are written in Markdown, a lightweight language that was made to be converted to HTML or many other formats. It’s extremely easy to learn, is ubiquitous on the web, and provides plenty of opportunities for customizing your posts beyond what you can do on Medium.
The posts for your website are located in the _posts/ folder and as you edit and save the files in Prose, you’ll be able to see them appear on your blog. Follow the naming convention: date-title.md and your post will automatically appear correctly named and dated on your site.
| Editing Markdown Document in Prose | Post as it Appears on Website |
|---|---|
 |
 |
If you already have posts on Medium, you can convert these to Markdown using this Chrome extension or this command line tool. The conversion isn’t perfect, but with a few edits, you’ll be able to quickly export your Medium work to your blog. I plan on writing an article about some tricks that I’ve used to make the process easier so stay tuned.
Going Further
The benefit of your own website is you can control every aspect of how things look and add any features you want. Start by digging through the files in the repository and looking at the Jekyll documentation. For example, to change fonts and styling, edit the style.scss file, and to enable functions such as comments on posts, edit the _config.yaml. You can even use a custom domain name by purchasing one through a web domain registrar like Hover and following this guide.
The nice thing about Jekyll is that if you just want to focus on writing, you can leave the defaults and you’ll have a clean, presentable blog. If you feel like making changes, then you can go as far as you want. For instance, I’ve added a live code editor to my about page to make it more interesting:
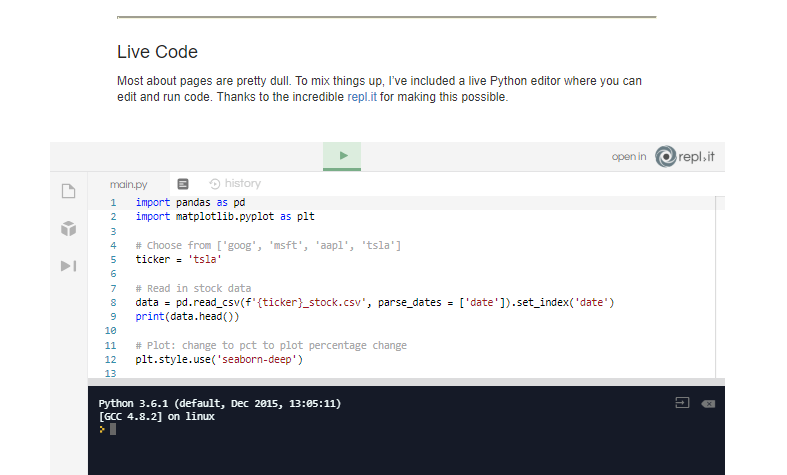 Live coding on my about page.
Conclusions
If you’ve been holding off on making a blog because you were concerned about the time or cost, then now is the time to get started. With GitHub Pages and Jekyll, you can have your own blog in five minutes for free!
As a reminder, the steps are:
- Fork the Jekyll Now repository to your GitHub account.
- Rename the repo to
username.github.io. Your website is now published. - Make changes to website files in the Prose online editor and save to update the website. Get started by changing
_config.yamland adding your markdown posts in_posts/. - Extend / customize the website as much as you want by reading documentation, looking at other websites, or just experimenting
I’m working on an article for how to move Medium posts to Markdown so watch for that. In the meantime, get started building your website!
As always, I welcome comments and feedback. I can be reached on Twitter @koehrsen_will or at my personal GitHub pages website willk.online.
(https://willk.online/).